

🚀 Start now:  — first launch takes a couple of minutes to build.
⏱ Estimated time: ~40 minutes • 🟡 Practical · optional
🎯 Who is this for? Anyone who will run nf-core pipelines on a High-Performance Computing (HPC) cluster.
You don’t need a cluster for this lesson. In Step 1 you’ll turn your Codespace into a small working cluster, running the same HPC scheduler software (Slurm). Every command you type here is one you’d type on a real cluster. Step 6 then covers what changes when you move to your institution’s machine.
What you’ll learn
- How a cluster works: login node, scheduler, compute nodes
- How to submit, watch and cancel jobs yourself
- How to get a pipeline onto the cluster
- How to run Nextflow on an HPC
- How to keep a long run alive, and running in the background
Step 0 — How a cluster works
So far everything has run on one machine. A cluster is many machines sharing one filesystem. You log in to a shared login node, and a scheduler hands out time on the compute nodes to everyone’s jobs.
Nextflow can talk to the scheduler for you, so you never write submission scripts by hand. The nextflow run process you start (the driver) does no analysis itself: it sends every task to the scheduler as a separate job with the correct resources/time/container, to compute nodes.
flowchart LR
  you["💻 You"] -- "ssh" --> login["🚪 Login node<br/>Nextflow driver<br/>(small, long-running)"]
  login -- "one job per task<br/>(sbatch · qsub)" --> sched["🗂️ Scheduler<br/>Slurm · SGE"]
  sched --> n1["⚙️ Compute node<br/>FASTQC (sample 1)"]
  sched --> n2["⚙️ Compute node<br/>FASTQC (sample 2)"]
  sched --> n3["⚙️ Compute node<br/>MULTIQC"]
  n1 --- fs[("🗄️ Shared filesystem<br/>work/ · results")]
  n2 --- fs
  n3 --- fs
| Term | What it means |
|---|---|
| Login node | Where you land after ssh. Fine for editing files and submitting jobs, not for running heavy tools. |
| Compute node | The machines that do the real work. You only get them by submitting jobs. |
| Scheduler | Decides which job runs where, and when. Common ones: Slurm, SGE, PBS, LSF. |
| Job | One piece of work sent to the scheduler, with a request for CPUs, memory and time. |
| Queue / partition | A named group of compute nodes with its own limits. SGE calls it a queue, Slurm a partition. |
| Driver | The nextflow run process itself. It submits and orchestrates jobs, and must keep running until the pipeline finishes. |
Step 1 — Turn your Codespace into a cluster
Run this from the eco-flow-training folder:
bash hpc/start_slurm.sh
✅ Expected output
This script installs Slurm, which takes about a minute. Then:
▶ Your practice Slurm cluster is ready 🎉
PARTITION  AVAIL  TIMELIMIT  NODES  STATE NODELIST
codespace*    up   infinite      1   idle codespaces-abc123
That table comes from sinfo, which lists the machines a scheduler has. Yours has one partition, codespace, with one node — your Codespace — currently idle.
You now have a real Slurm installation: the same software that runs on thousands of HPC systems, with the same commands. What it doesn’t have is other machines, so nothing here runs any faster.
⚠️ If your Codespace restarts, run
bash hpc/start_slurm.shagain. It’s safe to re-run at any time.
Step 2 — Submit a job yourself
Before we dive into Nextflow, lets submit a job the old fashioned way with a submission/job script.
In slurm, this will look like the following:.
▶️ Try it — write the script
Create
hello_job.sh(nano hello_job.sh):#!/bin/bash #SBATCH --job-name=hello #SBATCH --partition=codespace # on a real cluster: one of your cluster's partitions #SBATCH --cpus-per-task=1 #SBATCH --mem=1G #SBATCH --time=00:05:00 #SBATCH --output=hello_%j.log # %j is replaced by the job number echo "Running on $(hostname)" sleep 30 echo "Finished"
The #SBATCH lines are the resource request: how many CPUs, how much memory, how long, and which partition. The scheduler uses them to decide where and when your job runs.
▶️ Try it — submit it and watch it
sbatch hello_job.sh
squeue
✅ Roughly what you'll see
Submitted batch job 1
             JOBID PARTITION     NAME     USER ST       TIME  NODES NODELIST(REASON)
                 1 codespace    hello   vscode  R       0:01      1 codespaces-abc123
STis the job’s state:R= running,PD= pending (waiting for resources).- After about 30 seconds the job finishes and drops off
squeue. Its output is in the file named by--output: read it withcat hello_1.log.
▶️ Try it — cancel a job
Submit it again and stop it while it’s still running:
sbatch hello_job.sh
squeue
scancel <JOBID>      # the number sbatch printed
squeue
The job disappears from the queue, and its log stops where you interrupted it.
You’ve just written a job script by hand, easy. But when you run a pipeline, Nextflow writes one of these per task and submits them all for you. That’s where Nextflow excels.
📋 Extra info — the same commands on Slurm and SGE
Your cluster may use SGE instead of Slurm. The ideas are identical, the names differ:
| To… | Slurm | SGE |
|---|---|---|
| Submit a job script | sbatch run.sh |
qsub run.sh |
| List your jobs | squeue -u $USER |
qstat -u $USER |
| Cancel a job | scancel <id> |
qdel <id> |
| See the nodes / queues | sinfo |
qhost or qstat -g c |
| Why is my job not running? | scontrol show job <id> |
qstat -j <id> |
| Details of a finished job | sacct -j <id> |
qacct -j <id> |
And the job states you’ll see most often:
| Meaning | Slurm (squeue) |
SGE (qstat) |
|---|---|---|
| Running | R |
r |
| Waiting for resources | PD |
qw |
| Finishing up | CG |
t |
| Rejected — usually a bad resource request | F |
Eqw |
The same job script for SGE. SGE reads the same kind of header, with #$ instead of #SBATCH:
#!/bin/bash
#$ -N hello                # job name
#$ -q all.q                # your queue
#$ -l h_rt=00:05:00        # wall time
#$ -l mem=1G               # memory per core (some clusters use h_vmem)
#$ -cwd                    # run in the directory you submitted from
#$ -j y                    # merge errors into the output file
#$ -o hello.log

echo "Running on $(hostname)"
sleep 30
echo "Finished"
Submit with qsub hello_job.sh, watch with qstat, cancel with qdel <job id>. Your practice cluster here is Slurm, so you can’t run this version — but if your cluster is SGE, this is the file you’d write.
Step 3 — Get a pipeline on the cluster
We’ll use nf-core/demo: a tiny nf-core pipeline (FastQC → trimming with seqtk → MultiQC) that runs in a couple of minutes. You get it the same way as any nf-core pipeline: Nextflow fetches it for you.
▶️ Try it
nextflow pull nf-core/demo -r 1.2.0
nextflow list
nextflow info nf-core/demo
✅ Roughly what you'll see
Checking nf-core/demo:1.2.0 ...
 downloaded from https://github.com/nf-core/demo.git - revision: 32893afef8 [1.2.0]
nextflow list shows every pipeline Nextflow has downloaded for you (nf-core/rnaseq too, if you did Part 3), and nextflow info shows where it keeps them:
 project name: nf-core/demo
 repository  : https://github.com/nf-core/demo
 local path  : /home/vscode/.nextflow/assets/.repos/nf-core/demo
 main script : main.nf
 revisions   :
   ...
This is what nextflow run nf-core/demo does automatically the first time: it downloads the pipeline from GitHub into ~/.nextflow/assets/, and -r picks the release. To delete a downloaded copy, use nextflow drop nf-core/demo.
⚠️ Always pin the version (see Part 3). Nextflow itself changes too, and a very old pipeline release may not run on a current Nextflow. If an old release stops with
Config parsing failed, move-rto a newer release.
🔍 Optional — clone the pipeline yourself, to read or edit its code
Nextflow’s copy is filed away under a long path like ~/.nextflow/assets/.repos/nf-core/demo/clones/<commit>/, which is fine for running but awkward for reading. When you want to look at or change a pipeline’s code, clone it instead:
git clone --branch 1.2.0 https://github.com/nf-core/demo.git nf_practical/demo
ls nf_practical/demo
--branch 1.2.0 checks out that release. Git will mention a “detached HEAD”: that’s normal when you check out a release rather than a branch.
CHANGELOG.md  CITATIONS.md  CODE_OF_CONDUCT.md  LICENSE  README.md  assets  conf  docs
main.nf  modules  modules.json  nextflow.config  nextflow_schema.json  nf-test.config
ro-crate-metadata.json  subworkflows  tests  tower.yml  workflows
To run a clone, point Nextflow at its main.nf rather than the pipeline name, and leave out -r (the clone is already fixed at 1.2.0):
nextflow run ./nf_practical/demo/main.nf -profile test,docker --outdir demo_results
| Let Nextflow fetch it | Clone it yourself | |
|---|---|---|
| Best for | Running a published pipeline as-is | Editing the code, pipelines not on nf-core, development branches |
| Where it lives | ~/.nextflow/assets/ (managed for you) |
Wherever you cloned it |
| Pin the version | -r 1.2.0 |
git clone --branch 1.2.0, or git checkout 1.2.0 in an existing clone (-r isn’t used for a folder) |
| Update | nextflow pull nf-core/demo -r <new version> |
git pull for the latest code, or git checkout <new version> for a release |
A tour of the pipeline folder:
| Path | What’s in it |
|---|---|
main.nf |
The entry point: what nextflow run starts |
workflows/ |
The main workflow: which steps run, in what order |
subworkflows/, modules/ |
The building blocks. modules/nf-core/ are shared with other nf-core pipelines, modules/local/ are specific to this one |
conf/base.config |
Resources for each label (see Who decides each step’s CPUs and memory in Step 4) |
conf/test.config |
The test profile: tiny example input and small resource caps |
nextflow.config |
Default parameters, and the profiles (docker, singularity, test, institutional configs…) |
nextflow_schema.json |
Every --parameter, with its description and allowed values |
nextflow config prints the configuration after all profiles and config files are merged. Compare these two and look at the docker { and singularity { blocks — switching the profile just flips which container engine is enabled:
nextflow config ./nf_practical/demo/main.nf -profile test,docker
nextflow config ./nf_practical/demo/main.nf -profile test,singularity
When you’ve finished the lesson, you can delete the clone. Check the path before pressing enter — rm -rf deletes without asking:
rm -rf /workspaces/training/eco-flow-training/nf_practical
Step 4 — Let Nextflow submit the jobs
Now let’s try running a pipeline. Start the way you would on a laptop, with no cluster config at all — the pipeline from Step 3, with the test profile for its tiny example data:
nextflow run nf-core/demo -r 1.2.0 -profile test,docker --outdir demo_results
Watch the line near the top of the output:
executor > local (3)
local means Nextflow is running the tasks itself, right here, and nothing has been sent to the scheduler. Check from a second terminal (the ➕ in the terminal panel):
squeue # none of your jobs are listed
That one line was the whole point, so stop the run with Ctrl+C.
⚠️ On a real HPC this is the mistake to avoid. You’d be logged in to the login node, so
executor > localmeans every step of your pipeline runs there — on the machine everyone shares — and none of the cluster gets used. It’s the first thing to check whenever a cluster run behaves oddly.
Now tell Nextflow about the scheduler
One small config file changes that. It makes Nextflow write the #SBATCH header you wrote in Step 2 — for every task in the pipeline:
cat hpc/slurm_codespaces.config
process {
    executor = 'slurm'
    queue    = 'codespace'    // the Slurm partition start_slurm.sh creates
}
executor = 'slurm' is the whole trick; queue says which partition to use.
Run exactly the same command again, with the config added:
nextflow run nf-core/demo -r 1.2.0 -profile test,docker -c hpc/slurm_codespaces.config --outdir demo_results
While it runs, open a second terminal (the ➕ in the terminal panel) and watch jobs come and go:
watch -n 2 squeue # Ctrl+C to stop watching
✅ What to look for: the line
executor > slurm. That means every task is going to the scheduler as its own job. The run takes a few minutes (longer the first time, while containers download) and ends like this:executor > slurm (8) [f4/044c12] NFCORE_DEMO:DEMO:COWPY [100%] 1 of 1 ✔ [94/ace98a] NFCORE_DEMO:DEMO:FASTQC (SAMPLE3_SE) [100%] 3 of 3 ✔ [68/46c1d9] NFCORE_DEMO:DEMO:SEQTK_TRIM (SAMPLE3_SE) [100%] 3 of 3 ✔ [be/7be914] NFCORE_DEMO:DEMO:MULTIQC (demo) [100%] 1 of 1 ✔ -[nf-core/demo] Pipeline completed successfully-If it says
executor > local, the config wasn’t picked up and the tasks ran outside the scheduler. Check the-c hpc/slurm_codespaces.configpath.
▶️ Optional challenge — what did Nextflow ask Slurm for?
Nextflow writes a job script for every task: the .command.run file you met in Part 3. Take the hash from a FASTQC line of your output and look at the top of its script:
grep "^#SBATCH" work/94/ace98a*/.command.run # use your own FASTQC hash
Normally FASTQC asks for 2 CPUs, 12 GB and 4 hours. Does this job ask for that? If not, why not?
✅ Answer
#SBATCH -J nf-NFCORE_DEMO_DEMO_FASTQC_(SAMPLE2_PE)
#SBATCH -o /workspaces/training/eco-flow-training/work/94/ace98a.../.command.log
#SBATCH --no-requeue
#SBATCH --signal B:USR2@30
#SBATCH -c 2
#SBATCH -t 01:00:00
#SBATCH --mem 4096M
#SBATCH -p codespace
It asks for 2 CPUs (-c 2), but only 4 GB and 1 hour. The test profile caps every step at 2 CPUs, 4 GB and 1 hour (a resourceLimits block in conf/test.config) so the test runs anywhere. In a real run the same job would ask for the full 12 GB and 4 hours. -p codespace comes from the queue line in our config.
It’s the same kind of file you wrote in Step 2 — you just didn’t have to write it. On an SGE cluster, the same task’s script would start with #$ -N … and #$ -l h_rt=… instead.
💡 Want to know more? Who decides each step's CPUs and memory
Every step asks the scheduler for CPUs, memory and time. Those numbers come from the pipeline itself, in two parts.
First, each step carries a label. Every module has one near the top. Here’s the start of FASTQC’s, modules/nf-core/fastqc/main.nf:
process FASTQC {
    tag "${meta.id}"
    label 'process_low'
Second, the pipeline’s conf/base.config turns each label into a resource request:
withLabel:process_low {
    cpus   = { 2     * task.attempt }
    memory = { 12.GB * task.attempt }
    time   = { 4.h   * task.attempt }
}
So FASTQC asks for 2 CPUs, 12 GB and 4 hours, and on a cluster that becomes the job’s request: it waits until a node with 12 GB free is available.
💡
task.attemptis1on the first try and2on a retry, so a step that gets killed for using too much memory automatically asks for double next time. (nf-core pipelines retry on exit codes 130–145 — the codes schedulers use when they kill a job.)
🟦 The same config for an SGE cluster
process {
    executor = 'sge'
    queue    = 'all.q'        // your queue
    penv     = 'smp'          // the parallel environment name — ask your HPC team
}
You rarely write this yourself: if your cluster is listed on nf-co.re/configs, its profile already contains it (Step 6). Writing one from scratch is the ★ advanced page.
Step 5 — Keep the run alive
A real analysis runs for hours or days, and the driver has to keep running the whole time. If you close your laptop or lose your connection, nextflow run stops, and the pipeline stops with it. There are two ways to keep it going, and you’ll mostly use the first.
1. Submit the driver as a job — the right choice for anything long. It works on every cluster, and on the ones that forbid long-running processes on the login node it’s the only option. The driver becomes a small job of its own, which is what hpc/run_demo_slurm.sh does:
cat hpc/run_demo_slurm.sh
sbatch hpc/run_demo_slurm.sh
watch -n 2 squeue      # Ctrl+C to stop watching
✅ Roughly what you'll see
             JOBID PARTITION     NAME     USER ST       TIME  NODES NODELIST(REASON)
                12 codespace nf-NFCOR   vscode  R       0:07      1 codespaces-abc123
                13 codespace nf-NFCOR   vscode  R       0:07      1 codespaces-abc123
                11 codespace nf_drive   vscode  R       0:24      1 codespaces-abc123
Job 11 is the driver (nf_driver), and it has submitted pipeline steps (nf-NFCOR…) as jobs of their own. Its #SBATCH header asks for just 1 CPU and 2 GB, because Nextflow itself is light — the real work happens in the jobs it submits.
Follow its output with tail -f nf_driver_<JOBID>.log.
▶️ Try it — stop a run, then resume it
- While pipeline jobs are running, cancel the driver:
scancel <driver JOBID>. Checksqueue: its pipeline jobs go too, because Nextflow cancels its own jobs when it stops.- Submit it again:
sbatch hpc/run_demo_slurm.sh(the script already includes-resume).- When it finishes, find the steps that were reused:
grep -i cached nf_driver_<new JOBID>.log
⚠️ One driver at a time in a folder. Each
sbatch hpc/run_demo_slurm.sh(or-bgrun, below) starts another Nextflow run, and two runs launched from the same folder share the same cache, so they get in each other’s way. Ifsqueueshows twonf_driverjobs,scancelthe extra one.
📋 Extra info — what's -w work_slurm in the script?
-w chooses where Nextflow keeps its working files, and this run keeps them separate from Step 4’s rather than mixing the two together. It doesn’t stop -resume reusing work: that cache lives in the folder you launched from, so steps Step 4 already finished can show up here as Cached process > lines. On a cluster, -w matters for a different reason — those files get very large, so you point it at wherever your cluster keeps big data.
2. Run it in the background with -bg — simpler, and fine for shorter runs on clusters that allow them. Add the flag and Nextflow detaches itself: you get your prompt back, and you can close your terminal without stopping the run.
▶️ Try it — once
squeueshows nonf_driverjob, run Step 4’s command with-bgon the end:nextflow run nf-core/demo -r 1.2.0 -profile test,docker -c hpc/slurm_codespaces.config --outdir demo_results -bg > bg_run.log tail -f bg_run.log # Ctrl+C stops watching, not the run
Nextflow still prints its progress, so send it to a file (> bg_run.log), or it keeps appearing in your terminal. Check on it with tail -f bg_run.log whenever you log back in. To stop the run early, use kill $(cat .nextflow.pid): Nextflow saves its process ID in .nextflow.pid when you use -bg.
🖥️ Prefer tmux or screen?
Start a session on the login node (tmux new -s myrun), run Nextflow inside it normally, then detach with Ctrl+b then d. It keeps running after you log out, and tmux attach -t myrun puts you back in front of the live output.
Step 6 — Taking this to your own cluster
Everything so far works the same on a real HPC. These are the differences.
1. Getting on, and checking what’s there
ssh your_username@your.cluster.ac.uk   # log in to the login node
module avail nextflow                  # is Nextflow provided as a module?
module load nextflow                   # load it (names vary between clusters)
nextflow -version
java -version                          # Nextflow needs Java 17 or newer
singularity --version || apptainer --version
- No Nextflow module? You can usually install it in your home directory: see the official install guide.
- Singularity, not Docker. Docker needs a background service running with root privileges, which shared clusters can’t hand out. So where this lesson used
-profile docker, you’ll use-profile singularity(orapptainer). Both run the same containers.
2. Is there already a config for your cluster?
This is the most useful thing to check. The nf-core community keeps ready-made configs for around 160 institutions at nf-co.re/configs, each describing that cluster’s scheduler, container engine and limits — so you don’t have to write the executor/queue config from Step 4 yourself. The page lists them by name: cambridge, crick, eddie, imperial, sanger, ucl_myriad and many more.
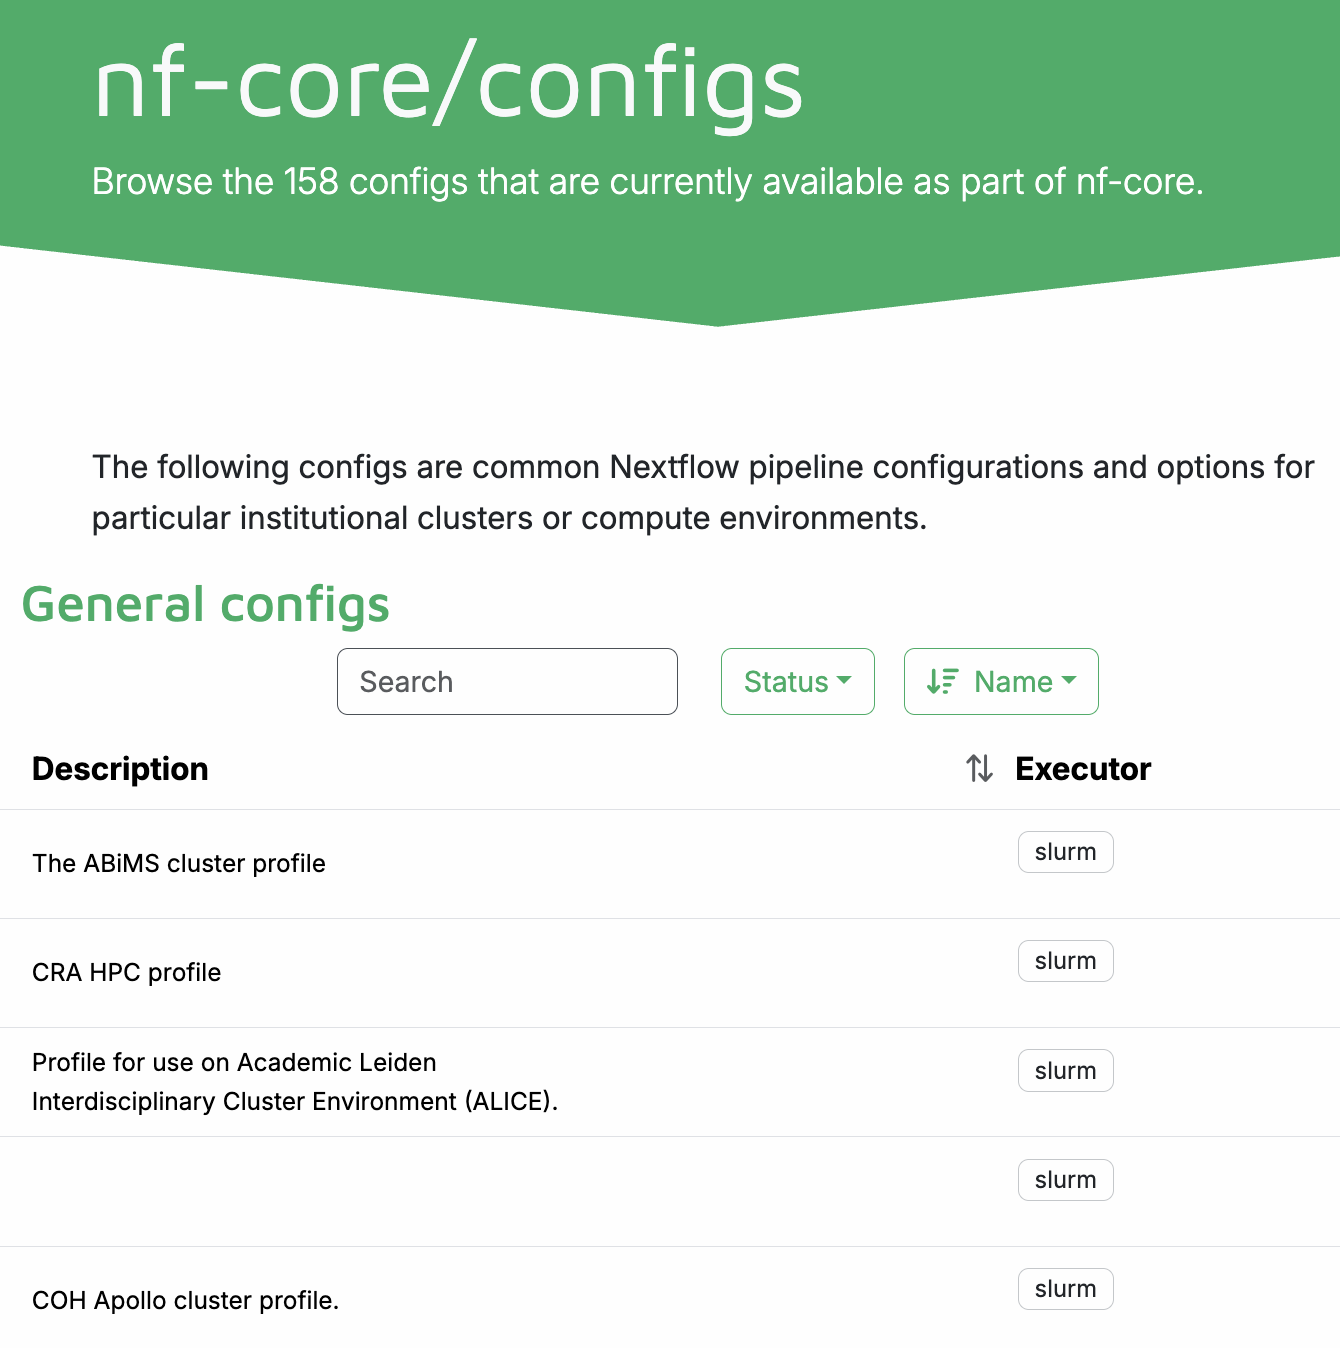
Each row is one cluster, and the Executor column tells you which scheduler it uses — a quick way to see how common Slurm and SGE are in practice.
If yours is listed, add it as a profile and Nextflow knows how to talk to your cluster:
nextflow run nf-core/demo -r 1.2.0 -profile test,<your_cluster> --outdir demo_results
That’s the -profile ucl_myriad you saw in Part 6. Open your cluster’s page first — most list setup steps, such as which Java module to load.
❓ Not listed? Where to get a config
In order:
- Ask around your institution. Someone in a neighbouring group often has a working config already.
- Ask your HPC team. They may not know Nextflow, but they can tell you the scheduler, queue names and limits, which is most of what a config needs.
- Ask the community. The nf-core Slack is friendly, and you can open an issue on nf-core/configs describing your cluster.
- Ask us. Email Eco-Flow at ecoflow . ucl @ gmail . com and we’ll help you put one together.
Writing one yourself is covered in ★ Advanced: setting up Nextflow for your HPC.
3. Where your files should be
| What | Default | Where it should go | How |
|---|---|---|---|
| Work directory: every intermediate file, can be huge | ./work |
Wherever your cluster keeps large working data | -w /path/with/space/work |
| Results | --outdir |
Storage you can keep, ideally backed up | --outdir /path/to/results |
| Nextflow’s own files: downloaded pipelines, plugins | ~/.nextflow |
Home is usually fine (it’s small) | nothing to do |
⚠️ Ask where large data should live — don’t assume. Many clusters have a “scratch” area for this, but not all, and the rules differ: some aren’t backed up, some delete files you haven’t touched for a few weeks. Your HPC team, or your cluster’s page on nf-co.re/configs, will tell you. Two things to remember once you know: copy results somewhere safe, and if
work/is deleted,-resumehas nothing left to resume from.
4. Your own driver script
On your cluster, write your own version of Step 5’s hpc/run_demo_slurm.sh: your partition or queue, a module load line if your cluster uses modules, -profile singularity,<your_cluster>, and -w pointing at wherever your cluster keeps large data:
🟨 Slurm — run.sh, submit with sbatch run.sh
#!/bin/bash
#SBATCH --job-name=nf_driver
#SBATCH --partition=<your_partition>
#SBATCH --cpus-per-task=1
#SBATCH --mem=4G
#SBATCH --time=48:00:00
#SBATCH --output=nf_driver_%j.log

module load nextflow                  # if your cluster uses modules

nextflow run nf-core/demo -r 1.2.0 \
  -profile singularity,<your_cluster> \
  --outdir /path/to/results \
  -w /path/with/space/work \
  -ansi-log false \
  -resume
🟦 SGE — run.sh, submit with qsub run.sh
#!/bin/bash -l
#$ -N nf_driver
#$ -l h_rt=48:00:00
#$ -l mem=4G                          # some SGE clusters use h_vmem instead
#$ -cwd
#$ -o nf_driver.log
#$ -j y

module load nextflow                  # if your cluster uses modules

nextflow run nf-core/demo -r 1.2.0 \
  -profile singularity,<your_cluster> \
  --outdir /path/to/results \
  -w /path/with/space/work \
  -ansi-log false \
  -resume
For a shorter run, the same nextflow run line with -bg works too (Step 5).
🧬 Optional — rerun Part 3's RNA-Seq analysis on your cluster
The Part 3 data is in this repository, so you can repeat that analysis on a real cluster:
git clone https://github.com/Eco-Flow/training.git
cd training/eco-flow-training

# The samplesheet from Part 3, with paths for wherever you cloned it
cat > samplesheet.csv <<EOF
sample,fastq_1,fastq_2,strandedness
CONTROL_REP1,$PWD/data/SRR6357070_1.fastq.gz,$PWD/data/SRR6357070_2.fastq.gz,auto
CONTROL_REP2,$PWD/data/SRR6357071_1.fastq.gz,$PWD/data/SRR6357071_2.fastq.gz,auto
CONTROL_REP3,$PWD/data/SRR6357072_1.fastq.gz,$PWD/data/SRR6357072_2.fastq.gz,auto
MANIPULATED_REP1,$PWD/data/SRR6357073_1.fastq.gz,,auto
MANIPULATED_REP2,$PWD/data/SRR6357074_1.fastq.gz,,auto
MANIPULATED_REP3,$PWD/data/SRR6357075_1.fastq.gz,,auto
EOF

# The genome and annotation, as in Part 3 Step 4
wget -O genome.fasta https://raw.githubusercontent.com/nf-core/test-datasets/7f1614baeb0ddf66e60be78c3d9fa55440465ac8/reference/genome.fasta
wget -O genes.gff.gz https://raw.githubusercontent.com/nf-core/test-datasets/7f1614baeb0ddf66e60be78c3d9fa55440465ac8/reference/genes.gff.gz
Then use this as the nextflow run line in the driver script above:
nextflow run nf-core/rnaseq -r 3.26.0 \
  -profile singularity,<your_cluster> \
  --input $PWD/samplesheet.csv \
  --fasta $PWD/genome.fasta \
  --gff $PWD/genes.gff.gz \
  --outdir rnaseq_results \
  -resume
nf-core/rnaseq 3.26.0 needs Nextflow 25.04.3 or newer (nextflow -version).
5. What the practice cluster couldn’t show you
- Queues and limits. Real clusters have several partitions/queues with maximum times and sizes, and jobs asking for more are rejected. Your HPC team’s documentation lists them.
- Waiting. On a busy cluster, jobs sit in
PD/qwfor a while before they start. That’s normal. - Real parallelism. Here everything shared one machine; there, tasks run on many machines at once.
- Internet access. Compute nodes often have none. Pull pipelines and containers on the login node first:
nextflow pull, ornf-core pipelines downloadfor the containers too.
Step 7 — Common issues list
| ✅ Do | Why |
|---|---|
Run the test profile first |
It catches config mistakes in minutes, not hours |
Check for executor > slurm/sge, not local |
local means everything is running on the login node |
| Keep the driver alive (Step 5), and don’t run heavy tools yourself on the login node | It’s shared, and admins will stop long or heavy processes there |
Pin the version with -r |
You get the same version of the pipeline every time, so a rerun months later gives the same analysis |
| Use Singularity/Apptainer, not Docker | Docker is almost never allowed on shared clusters |
Put work/ wherever your cluster keeps large data, and results somewhere you can keep |
work/ gets very large, and temporary areas are often cleaned out automatically |
| Pre-download if compute nodes are offline | Use nextflow pull or nf-core pipelines download on the login node |
Add -resume after fixing a problem |
Finished steps are reused instead of recomputed |
Read <outdir>/pipeline_info/ |
nf-core writes an execution report, timeline and trace there, showing how much memory and time each step really used |
Keep your run command in a script (like run.sh) and in git |
Reproducible, easy to rerun, easy to share (see Part 7) |
| Clean up when you’re happy | nextflow clean -f, or delete work/, but only once you won’t need -resume |
🔍 Exit codes 130–145 (for example
137or140) usually mean the scheduler killed the job for going over its memory or time. nf-core pipelines retry once with double the resources (Step 4). If a step fails again, it needs more than it’s allowed: ask your HPC team, or see how to raise a label’s resources on the ★ advanced page.
Recap
- A cluster is a login node plus a scheduler handing out compute nodes. You send it jobs.
- A job is a script with a resource request in its header (
#SBATCH, or#$on SGE). You wrote one in Step 2. - Nextflow writes those scripts for you:
executor = 'slurm'(or'sge') is all it takes, and each step’s CPUs and memory come from its label inconf/base.config. - Smoke-test with the
testprofile and check the banner saysexecutor > slurm, notlocal. - Keep the driver alive, as its own job or with
-bg, and use-resumeafter any interruption. - On your own cluster: load Nextflow, use Singularity, and check nf-co.re/configs for a ready-made profile before writing anything yourself.
Finish
🎉 You’ve run a pipeline through a real job scheduler, and seen how Nextflow turns each step into a job — exactly as it will on your institution’s cluster.
Next steps:
- Continue to Part 9 · Seqera Platform ▶️ to watch your runs live in the browser.
- Your cluster has no ready-made config? See ★ Advanced: setting up Nextflow for your HPC.
- Stuck? The nf-core Slack is full of people running pipelines on clusters like yours. Or get in touch with us at Eco-Flow: ecoflow . ucl @ gmail . com