
🚀 Start now: ![]() — first launch takes a couple of minutes to build.
— first launch takes a couple of minutes to build.
⏱ Estimated time: ~20 minutes • 🟢 No coding required yet
Welcome! This page gets your working environment ready and gives you a quick tour of it. By the end you’ll have the course open in VS Code and know your way around.
On this page:
- Prerequisites
- Option A — GitHub Codespaces (recommended)
- Getting to know the environment — a quick VS Code / Codespaces tour
- Option B — Run locally (not recommended)
Prerequisites
For this course you need three things:
- A stable internet connection.
- A browser (ideally Chromium-based — Google Chrome, Microsoft Edge, Brave, etc.).
-
A GitHub account — sign up at https://github.com/join (takes under 15 minutes; you may need to verify with your mobile phone).
Option A — GitHub Codespaces (recommended)
✅ This is the recommended way to take the course. A Codespace is a free, cloud-based VS Code environment (with limited free hours per month) that already has everything installed — Nextflow, Java, Docker and all the course files. Everyone gets an identical setup, so there’s nothing to configure. If in doubt, use this option.
Launch a Codespace
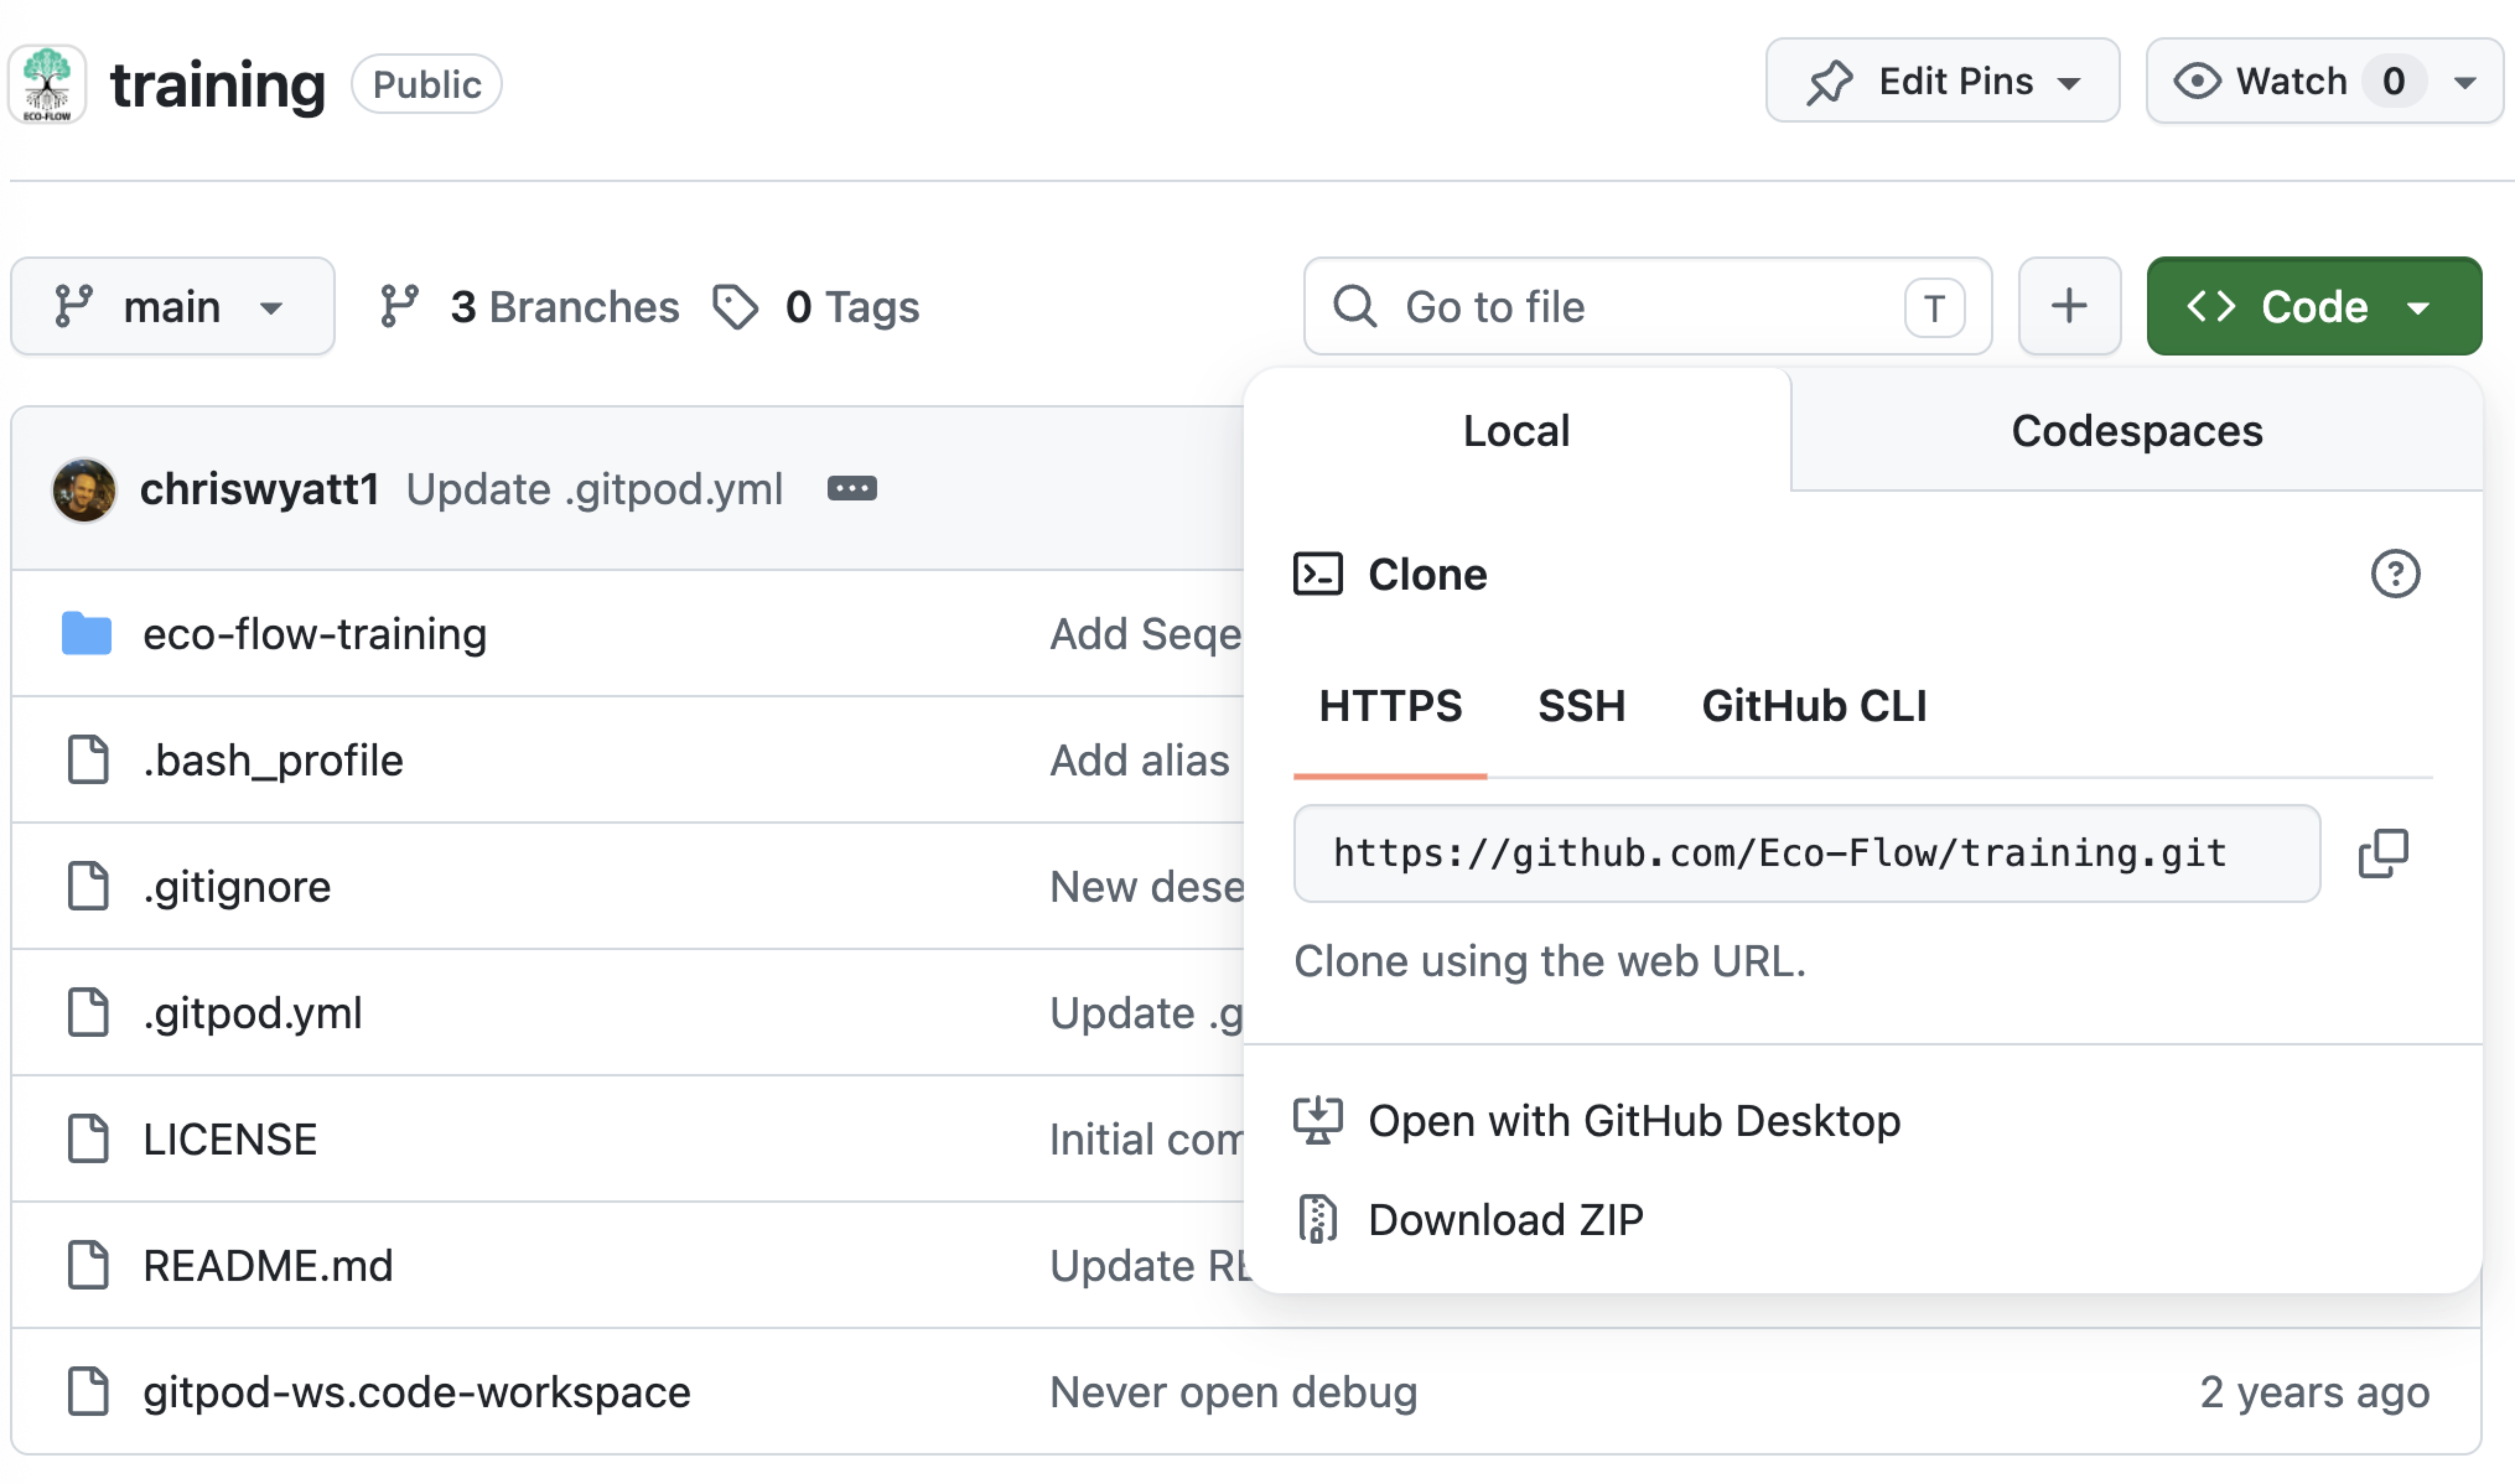
- Go to the course repository: https://github.com/Eco-Flow/training/tree/main
- Click the green
< > Codebutton. - Select the Codespaces tab, then “Create codespace on main”.
- If prompted, choose Log in with GitHub and enter your credentials.
The Codespace takes a minute or two to build the first time. When it’s ready you’ll see the VS Code editor open in your browser, similar to the screenshot below.

✅ If you see this screen, you’re in! (Your file list may look slightly different — that’s fine.) Spend a few minutes on the tour below before moving on.
⏳ Be patient on the first launch. Building the Codespace takes a couple of minutes the first time (it’s installing Nextflow, Java, Docker and pulling the pipeline containers). It isn’t stuck — later launches are much faster.
📖 The course material comes with it. These lesson pages are part of the repo, so they’re right there in the Codespace under
eco-flow-training/docs/. You can read them inside VS Code instead of switching between tabs — open a.mdfile and pressCtrl + Shift + V(Cmd + Shift + Von a Mac) for a formatted preview.
❓ Stuck? If you can’t reach this screen, shout out to a tutor.
Getting to know the environment
VS Code — whether in Codespaces or on your own machine — is laid out in a few main areas. Here’s what you’re looking at in the screenshot above:
| Area | Where | What it’s for |
|---|---|---|
| Activity Bar | far-left icon strip | Switch between the Explorer, Search, Source Control (git), Extensions, etc. |
| Explorer | left panel | The file tree — your folders and files. Click a file to open it. |
| Editor | centre | Where you read and edit files. Open files appear as tabs along the top. |
| Panel | bottom | Tabbed area containing the Terminal, Problems, Output and Ports. |
| Status Bar | very bottom | Shows your Codespace name, the current git branch (main), and more. |
Below are the handful of skills you’ll actually use during the course. Try each one now.
🖥️ Find and open the Terminal
The terminal is where you’ll type the commands in Part 1 and run pipelines later. It lives in the Panel at the bottom, under the TERMINAL tab.
If you don’t see it, open a new one in any of these ways:
- Menu ☰ → Terminal → New Terminal, or
- Keyboard shortcut
Ctrl + `(the backtick key, top-left of most keyboards), or - Command Palette (see below) → type “Terminal: Create New Terminal”.
▶️ Try it: open a terminal and type
pwdthen press Enter. In Codespaces it should print a path ending ineco-flow-training— that’s where the course exercises expect you to be.
📋 Copy and paste
Throughout this course you’ll copy commands from these pages into the terminal. Hover any code block and click the Copy button, then paste with Ctrl + V (Cmd + V on a Mac).
Annoyed at being asked for clipboard permission every time? Here’s how to stop it for good:
🔧 Fix the repeating "wants to see text and images copied to the clipboard" prompt
When you first paste into the terminal, your browser asks:
…github.devwants to — See text and images copied to the clipboard — Block / Allow
Click Allow. This is expected and safe — it’s what lets you paste into the terminal. If you click Block, pasting will silently stop working.
Why it keeps coming back: every Codespace gets its own random web address (like upgraded-carnival-rjrgpj57q5cpgg5.github.dev). Browser permissions are tied to the exact address, so allowing it once only covers that Codespace. Start a fresh one and you get a new address — and the prompt returns.
The permanent fix — allow it once for all Codespaces:
- Chrome / Edge: go to
chrome://settings/content/clipboard, find “Allowed to see text and images copied to the clipboard”, click Add, and enter:[*.]github.dev - Firefox: you shouldn’t need this — Firefox handles pasting differently and won’t nag you the same way.
That one entry covers every Codespace you create from now on.
💡 Pasting into the terminal not working properly? If characters go missing when you paste a long command, try right-click → Paste instead of the keyboard shortcut. Alternatively, use VS Code Desktop connected to your Codespace, which avoids browser clipboard restrictions entirely.
📂 Open and edit a file
Click any file in the Explorer to open it in the editor. Make a change, then save with Ctrl + S (Cmd + S on a Mac). Unsaved files show a dot ● on their tab.
For a Markdown file like this one, you can see a nicely-formatted preview: open the file and click the preview icon (top-right of the editor) or press Ctrl + Shift + V.
⬇️ Download a file to your own machine
Because Codespaces runs in the cloud, files live on the server — but you can pull them down whenever you need to:
- In the Explorer, right-click the file you want.
- Choose Download.
- Your browser saves it to your computer’s Downloads folder.
💡 You’ll use this in Part 1 to download your saved command
history. To go the other way (from your machine into the Codespace), drag a file into the Explorer or right-click and choose Upload.
🎨 The Command Palette — your shortcut to everything
Press Ctrl + Shift + P (Cmd + Shift + P on a Mac) to open the Command Palette. Start typing the name of almost any action (“terminal”, “preview”, “download”…) and run it without hunting through menus. When in doubt, this is the fastest way to find a feature.
💾 Saving your work and ending a session
Your Codespace keeps your files between sessions, but closing the browser tab ends the session, so save anything important first (Ctrl + S). You can reopen or manage your Codespaces any time at https://github.com/codespaces.
🧹 Closing a Codespace and starting a fresh one
Closing the browser tab only stops the Codespace — it stays around, and so does everything on its disk (work/ directories, downloaded containers, results). Some parts of this course ask you to start again from a clean Codespace, which means deleting the old one first.
To delete a Codespace:
- Go to https://github.com/codespaces — every Codespace you own is listed there.
- Find the one for the
Eco-Flow/trainingrepo. - Click the
···menu on its right-hand side. - Choose Delete, then confirm.

⚠️ Deleting is permanent. Anything you haven’t saved elsewhere goes with it — download any results or scripts you want to keep first (right-click → Download, see above).
To start a fresh one: go back to the Open in GitHub Codespaces link (or the green < > Code button → Codespaces tab → Create codespace on main) and launch it exactly as you did the first time. It’ll take a couple of minutes to build again, and you’ll get a brand-new, empty disk.
✅ Orientation checklist
Before you head to Part 1, make sure you can:
- Open a terminal and run
pwd - Open a file from the Explorer and preview this page as formatted Markdown
- Download a file to your machine (right-click → Download)
- Open the Command Palette (
Ctrl/Cmd + Shift + P)
New to VS Code and want more? The official intro is here: https://code.visualstudio.com/docs/getstarted/userinterface
Option B — Run locally (not recommended)
⚠️ This is not the preferred way to take the course. Codespaces (Option A) gives everyone an identical, pre-configured environment. Running locally means installing and troubleshooting the tools yourself, and results can vary between machines — this is especially fiddly on Windows. Only choose this route if you cannot use Codespaces, and be ready to debug your own setup.
If you still want to run locally, you will need the following installed on your machine:
- VS Code — the editor used throughout the course.
- Git — to clone the course repository.
- Java 17+ — required by Nextflow (check with
java -version). - Nextflow — the workflow engine (you’ll also (re)install it as an exercise in Part 1).
- Docker — used to run the nf-core RNA-Seq pipeline containers. Make sure Docker Desktop is running.
💡 Windows users: install and run everything inside the Windows Subsystem for Linux (WSL) rather than native Windows, so the UNIX commands in Part 1 behave as described.
Then clone the course repository (the HTTPS URL is under the green Code button → Local tab) and open it in VS Code:
git clone https://github.com/Eco-Flow/training.git
cd training/eco-flow-training
code .
Unlike Codespaces, your terminal will not start inside eco-flow-training automatically, and the absolute paths shown in the exercises (e.g. /workspaces/training/eco-flow-training) will be different on your machine. That’s fine — just make sure you cd into the eco-flow-training folder before starting the exercises. What matters is that pwd ends in eco-flow-training.
Once you can open the repo in VS Code and java -version and nextflow info both work, you’re ready to begin.
Next
You’re set up! On to the command line.
Head back to the menu → click here
Head to Part 1 → click here